LPN linking
Use this transaction to perform the following actions:
-
Assign one or several stock lines to a license plate number (LPN) and store the LPN in a location. Each stock line includes the product characteristics (product code, location, status, lot, etc.).
-
Generate stock change movements and create a stock change document in Sage X3.
Note - informationAn LPN can be a pallet, a box, a barrel or any kind of logistic container.
Prerequisites
In Sage X3, perform the actions described below.
Functional prerequisites
Mobile Automation setup (FUNADCSEARCH)
Open: Setup > Stock > Mobile Automation setup
-
Go to the Stock search section.
-
Select the Container operation flow type.
-
Define the stock search filters that you want to use in this transaction. You can define up to 8 filters. These stock search filters are the same for the LPN linking, LPN unlinking, and LPN splitting transactions.
In the Mobile Automation setup function, the Identifier 1, the Identifier 2, the Lot, and the Sublot are the 4 filters defined for the NA021 site.
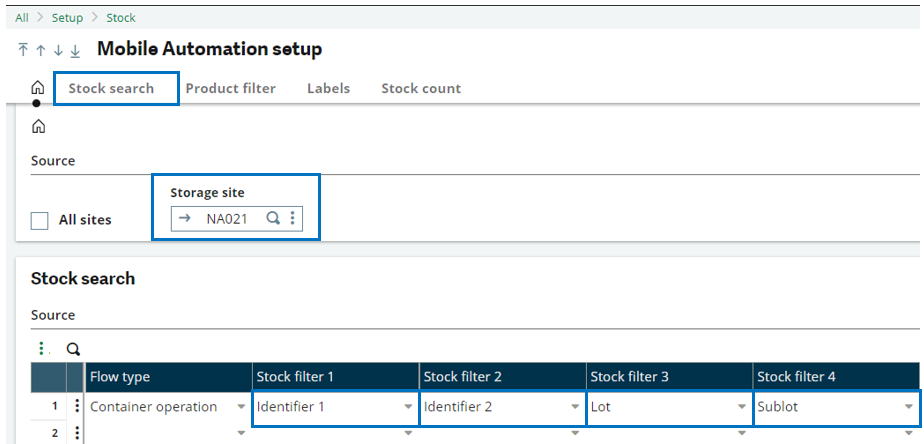
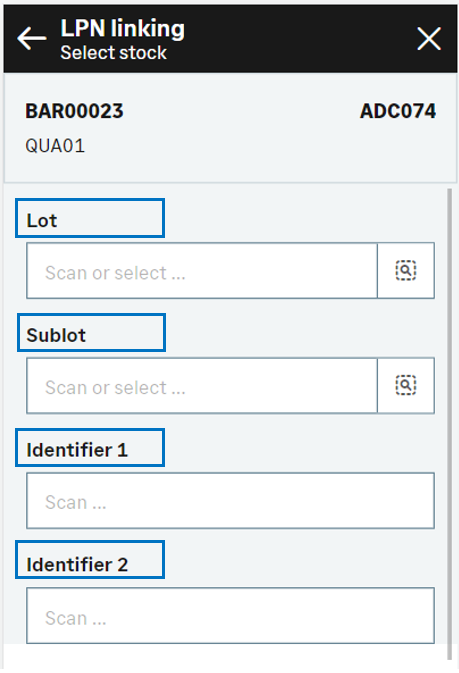
In the LPN linking transaction, they display in the following order:
How to link stock lines to an LPN
Open: LPN > LPN linking
To link stock lines to an LPN, enter information on 3 pages:
- The initial page is used to select the destination LPN, and the product to be linked to the LPN.
- The second page is used to select the product stock lines. From this page, you can also perform the following actions:
- Display the stock line details
- Enter the exact quantity to link to the LPN
-
The third page is used to validate the creation of the stock change document and validate the stock movement.
Operating mode
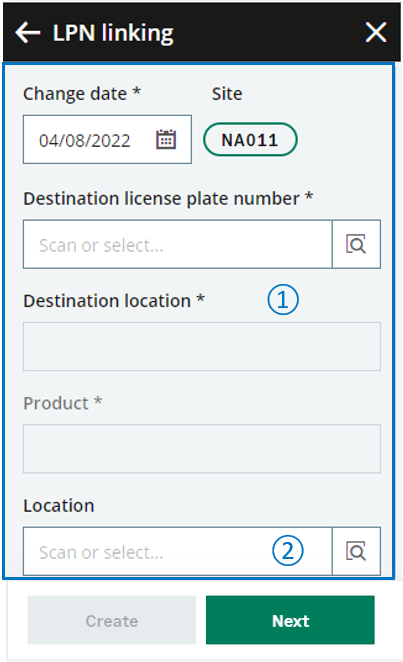
- On the initial page, check that the Change date and Site default values are correct.
-
Scan, select or enter the Destination license plate number to which the product is going to be linked.
-
Scan, select or enter the Destination location if the LPN is not yet assigned to any location.
-
Scan, select or enter the Product to link to the LPN.
-
Tap Next to display the list of the existing stock lines for the product. You can filter the list based on the selection filters displayed in the header. These filters are defined in the Mobile Automation setup function (FUNADCSEARCH). Refer to the Functional prerequisites.
-
Select the checkbox for each stock line that you want to link to the LPN. To access the stock line details, enter a smaller quantity and select the stock details, tap the line.
-
Tap Next when you have selected the stock lines and stock details to be linked to the LPN. You are automatically redirected to the initial page. The stock lines linked to the LPN are listed at the bottom of the screen. You are ready to complete one of the following actions:
Link another product to the same LPN, if this LPN is not defined in the License plate number function (GESLPN) as a single-product managed LPN: Repeat steps 4 to 7.
- Validate the creation of the stock change document: Go to step 8.
- Delete a line: Tap the delete icon.
-
Tap Create to validate the stock change movement.
-
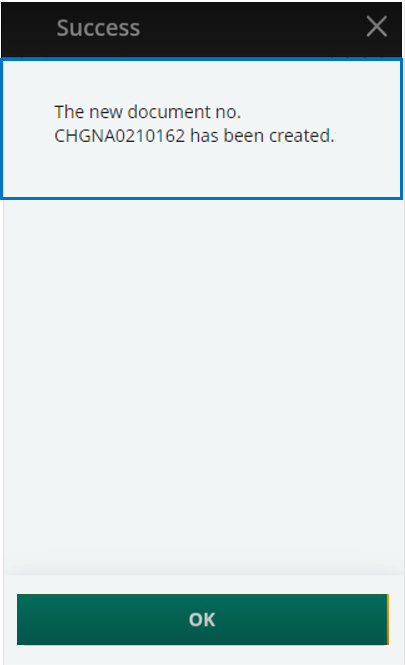
If you were able to proceed with the creation, the generated stock change number displays. The stock change document and its associated movements are created.
-
If you could not proceed with the creation, an error or information message displays.
-
Tap Go back to display the previous page.
-
Tap Cancel to delete all the stock changes.
-
-
Step by step
LPN linking initial page
 |
|
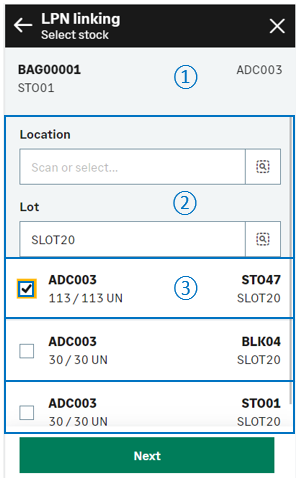
LPN linking - Select stock
Use this page to select the stock lines to be linked to the LPN.
|

|
The header displays the following information:
|

|
The filters defined in the Mobile Automation setup function (FUNADCSEARCH) display here. Use them to filter the list of stock lines. Note - informationThe filter displayed on the previous page displays only if you did not use it.
|
|

|
The list of stock lines displays. Each stock line displays the following information:
|
|
|
|
You can perform the following actions:
|
|
|
Tap Next to display the initial page with the selected stock lines to be linked to the LPN. You are ready to perform the following actions:
|
LPN linking - Select stock
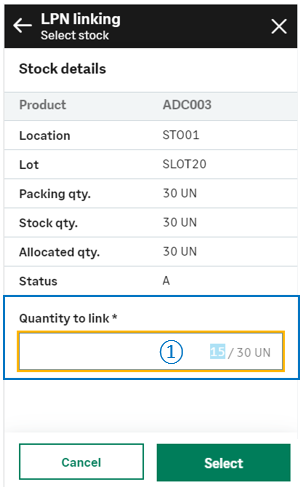
When you tap a stock line, a page displays the stock details. You can enter a quantity smaller than the quantity in stock.
|
|
|
|
|
||
|
|
Update the quantity to link. | |
|
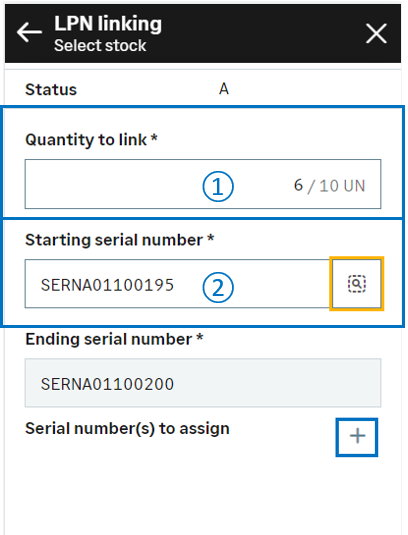
Depending on how the product is managed, you might need to select the related stock details.
For example, if the product is managed by global serial number, you need to select the range of serial numbers to be linked.
|
||
|
|
Keep or update the quantity to link. | |
|
|
Select the Starting serial number. The Ending serial number is automatically selected based on the quantity. Note - errorOnly sequential serial numbers can be selected: The quantity you enter must be consistent with the range of serial numbers.
|
|
| Tap the + icon to validate your selection and display a summary of the selected stock details. | ||
|
|
|
|
|
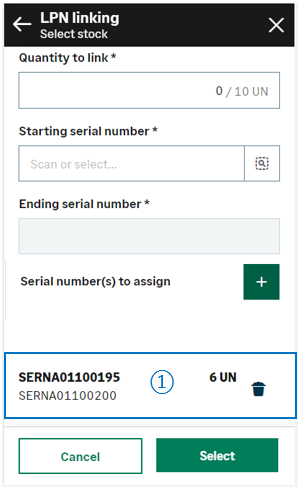
A summary of the selected stock details is displayed. You can repeat the previous step:
|
|
|
When you have selected all the serial numbers to link, tap one of the following actions:
|
Create the stock change document and generate stock movements
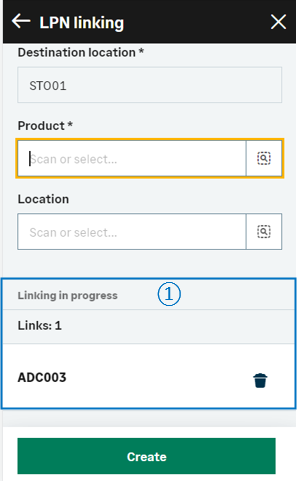
When you have selected all the stock lines along with the quantity and stock details, tap Next to display the initial page with the selected stock lines.
|
||
|
|
The list of LPNs in linking progress displays at the bottom of the page and provides the following information:
You are ready to perform the following actions:
|
|
|
Tap Create when you have completed linking your LPNs and you are ready to validate the creation of the stock change document and generate the stock movements. |
||
|
A message displays the generated document number. |
|
|
When the stock change document and the stock movements are created, you can display the result in the following Sage X3 functions:
|
||
|
Note - informationTo access a LPN linking transaction, CWSLPNA must be authorized.
To create a LPN linking transaction, GESLPNAFF must be authorized. |
||
| Field | Description | Sage X3 field code | Table (data creation) |
|---|---|---|---|
| Site | Receipt site | STOFCY | SCHGH |
| Change date | Effective date | IPTDAT | SCHGH |
| Destination license plate number | License plate number of destination | LPNNUM | SCHGD |
| Destination location | Location of destination | LOCDES | STOJOU |
| Product | Product code | ITMREF | STOREO |
| Location | Location | LOC |
STOREO |
| Lot | Lot number | LOT | STOALL |
| Sub-lot | Sub-lot number | SLO | STOALL |
| Serial number | Serial number | SERNUM | STOALL |
Limitations
The management rules are the same as in the License plate number assignment function (GESLPNAFF). There is no consistency control of the quantities of the selected stock lines and the filling capacity of the selected LPN.